How to Calibrate a pH Test Pen:
Step-by-Step Guide for Accurate Testing
Calibrating your digital pH test pen is essential for obtaining accurate pH measurements in water quality testing, hydroponics, aquariums, and laboratory applications. A properly calibrated pH meter ensures reliable readings by using standard buffer solutions to adjust the electrode’s response. This comprehensive guide covers everything you need to know about pH pen calibration, maintenance, and troubleshooting.
Why pH Meter Calibration is Critical
pH meters require regular calibration because electrodes naturally drift over time, leading to inaccurate measurements. At least a two-point calibration using buffer solutions (typically pH 4.01 and pH 7.00) is necessary to ensure your digital pH tester displays correct values. For high-accuracy applications, a three-point calibration including pH 10 buffer is recommended.
What You Need for Calibration
Required Materials
- Digital pH test pen
- pH 4.01 standard buffer solution (or pH 4.0)
- pH 6.86 standard buffer solution (or pH 7.0)
- Distilled or deionized water for rinsing
- Clean filter paper or lint-free cloth
- Small beakers or containers for buffer solutions
Buffer Solution Selection
Always use fresh buffer solutions within their expiration date. The most common calibration buffers are pH 7 (neutral), pH 4 (acidic), and pH 10 (alkaline). Buffer solutions should bracket your expected measurement range—if testing alkaline samples above pH 7, use pH 7 and pH 10 buffers.
Step-by-Step Calibration Process
Initial Preparation
Step 1: Clean and Hydrate the Electrode Before calibration, ensure the pH electrode is clean and properly hydrated. If the electrode has been dry, soak the glass membrane in pH 7 buffer or distilled water for at least 1 hour. Remove the protective cap and rinse the electrode with distilled water.
Step 2: Prepare Buffer Solutions Pour fresh buffer solutions into separate clean beakers. Use each buffer solution at the recommended temperature of 25°C (77°F) for optimal accuracy. For best practices, use two beakers for each buffer solution—one for calibration and another for rinsing the electrode to prevent cross-contamination.
Two-Point Calibration Procedure
Step 3: Calibrate to pH 7 (or pH 6.86)
- Turn on the pH meter by pressing the “ON/OFF” button
- Immerse the electrode in pH 6.86 (or pH 7.0) standard buffer solution at 25°C
- Wait for the reading to stabilize (approximately 30 seconds to 1 minute)
- Press and hold the “CAL” button for 5 seconds
- The display screen will start flashing, showing the calibration sequence
- Wait until the display screen stops flashing and shows “end”—this indicates the pH 6.86 point calibration is complete
- Remove the electrode and rinse thoroughly with distilled water
- Wipe dry with filter paper
Step 4: Calibrate to pH 4 (or pH 4.01)
- Immerse the cleaned electrode in pH 4.01 (or pH 4.0) standard buffer solution at 25°C
- After the display stabilizes, press the “CAL” button for 5 seconds
- The display screen will flash, indicating calibration is in progress
- Wait until the screen stops flashing and displays “end”—the pH 4 calibration is complete
- Clean the electrode with distilled water and wipe with filter paper
Step 5: Final Steps
Turn off the pH meter by pressing the “ON/OFF” button and replace the protective cap. Your pH test pen is now calibrated and ready for accurate measurements.
How to Use Your Calibrated pH Meter
Measurement Procedure
- Remove the protective cap from the electrode
- First rinse the electrode with distilled water and wipe with filter paper
- Turn the meter on by pressing the “ON/OFF” button
- Immerse the pH meter electrode in the solution to be tested (ensure the electrode is fully submerged past the immersion line)
- Stir gently, then release the pH meter instrument
- Wait approximately 30 seconds until the reading stabilizes
- After finishing, clean the electrode with pure water and wipe with filter paper
- Turn off the meter and replace the protective cap
pH Electrode Maintenance and Care
Storage Best Practices
Always recap the protective cap after use to prevent the electrode from drying out. A dry electrode leads to slow or unstable readings. Store the electrode with a moistened sponge in the protective cap or in pH 7 buffer solution. Never store pH electrodes in distilled water for extended periods, as this can damage the electrode.
Cleaning Guidelines
If the electrode has been dried out, immerse it in distilled water for a few hours to rehydrate. For stubborn deposits, use appropriate cleaning solutions rather than mechanical scrubbing, which can damage the sensitive glass membrane. After cleaning, rinse thoroughly with distilled water and recalibrate.
When to Recalibrate
Recalibration is necessary in the following conditions:
- After long periods of non-use or very long time after initial calibration
- When the electrode is used very frequently
- When testing accuracy requirements are very high
- After extended button presses in the air (avoid pressing “CAL” button for extended periods when not calibrating)
- When the low battery symbol appears on the display
Troubleshooting Common Issues
Low Battery Indicator
When the battery symbol appears on the display, promptly replace the battery. The pH pen typically uses 2 × 1.5V LR44 button cells. Unscrew the battery cover and replace all two 1.5V batteries while paying attention to their polarity. Recalibrate the meter after battery replacement.
Fuzzy or Unstable Readings
Fuzzy or unstable display values indicate the battery needs replacement. Additionally, a dry electrode can cause sluggish or inaccurate readings—rehydrate by soaking in buffer solution or distilled water.
Calibration Tips for Accuracy
Use two beakers for each buffer solution: one containing pure buffer for calibration and another for cleaning the electrode. This prevents pollution of the buffer solution and maintains calibration accuracy. Always ensure buffer solutions are fresh and within their expiration date.
Technical Specifications
Typical pH Pen Specifications
- Measure Range: 0.00 - 14.00 pH
- Resolution: 0.01 pH
- Accuracy: +/- 0.01 pH
- Power Supply: 2 × 1.5V LR44 button cells
- Operating Temperature: 0°C - 60°C
- Calibration: Two points automatic calibration
- Dimensions: Approximately 153 × 29 × 16 mm
- Weight: Approximately 52g
Membership Benefits: Professional Calibration Services
While calibrating your pH pen at home is straightforward, many users prefer professional calibration services to ensure maximum accuracy. Consider joining our membership program for exclusive benefits:
What’s Included in Membership
- Free pH pen calibration service - Bring your pH meter for professional calibration anytime
- Priority technical support - Get expert help with troubleshooting and maintenance questions
- Discounted buffer solutions - Save on pH 4.01, 6.86, and 10.01 calibration buffers
- Annual electrode inspection - We check your electrode condition and storage fluid levels
- Calibration reminder notifications - Never miss your recalibration schedule
- Extended warranty coverage - Additional protection for your pH testing equipment
Why Choose Professional Calibration
Even with the detailed instructions provided in this guide, professional calibration services offer several advantages. Our technicians use laboratory-grade buffer solutions, ensuring your pH pen meets the highest standards. This is particularly valuable for applications requiring very high testing accuracy such as scientific research, pharmaceutical testing, or precision aquaculture where even small pH variations can impact sensitive species like crystal red shrimp.
Professional calibration also includes electrode health assessment - we can detect early signs of electrode degradation that might not be obvious during home calibration. Members receive detailed calibration certificates documenting traceability to international standards, which can be important for regulatory compliance or quality assurance records.
How to Get Started
Visit our website or contact us to learn more about membership tiers and pricing. Most members find that the free calibration services alone pay for the annual membership fee, especially if you use multiple pH meters or require frequent recalibration due to intensive electrode use.
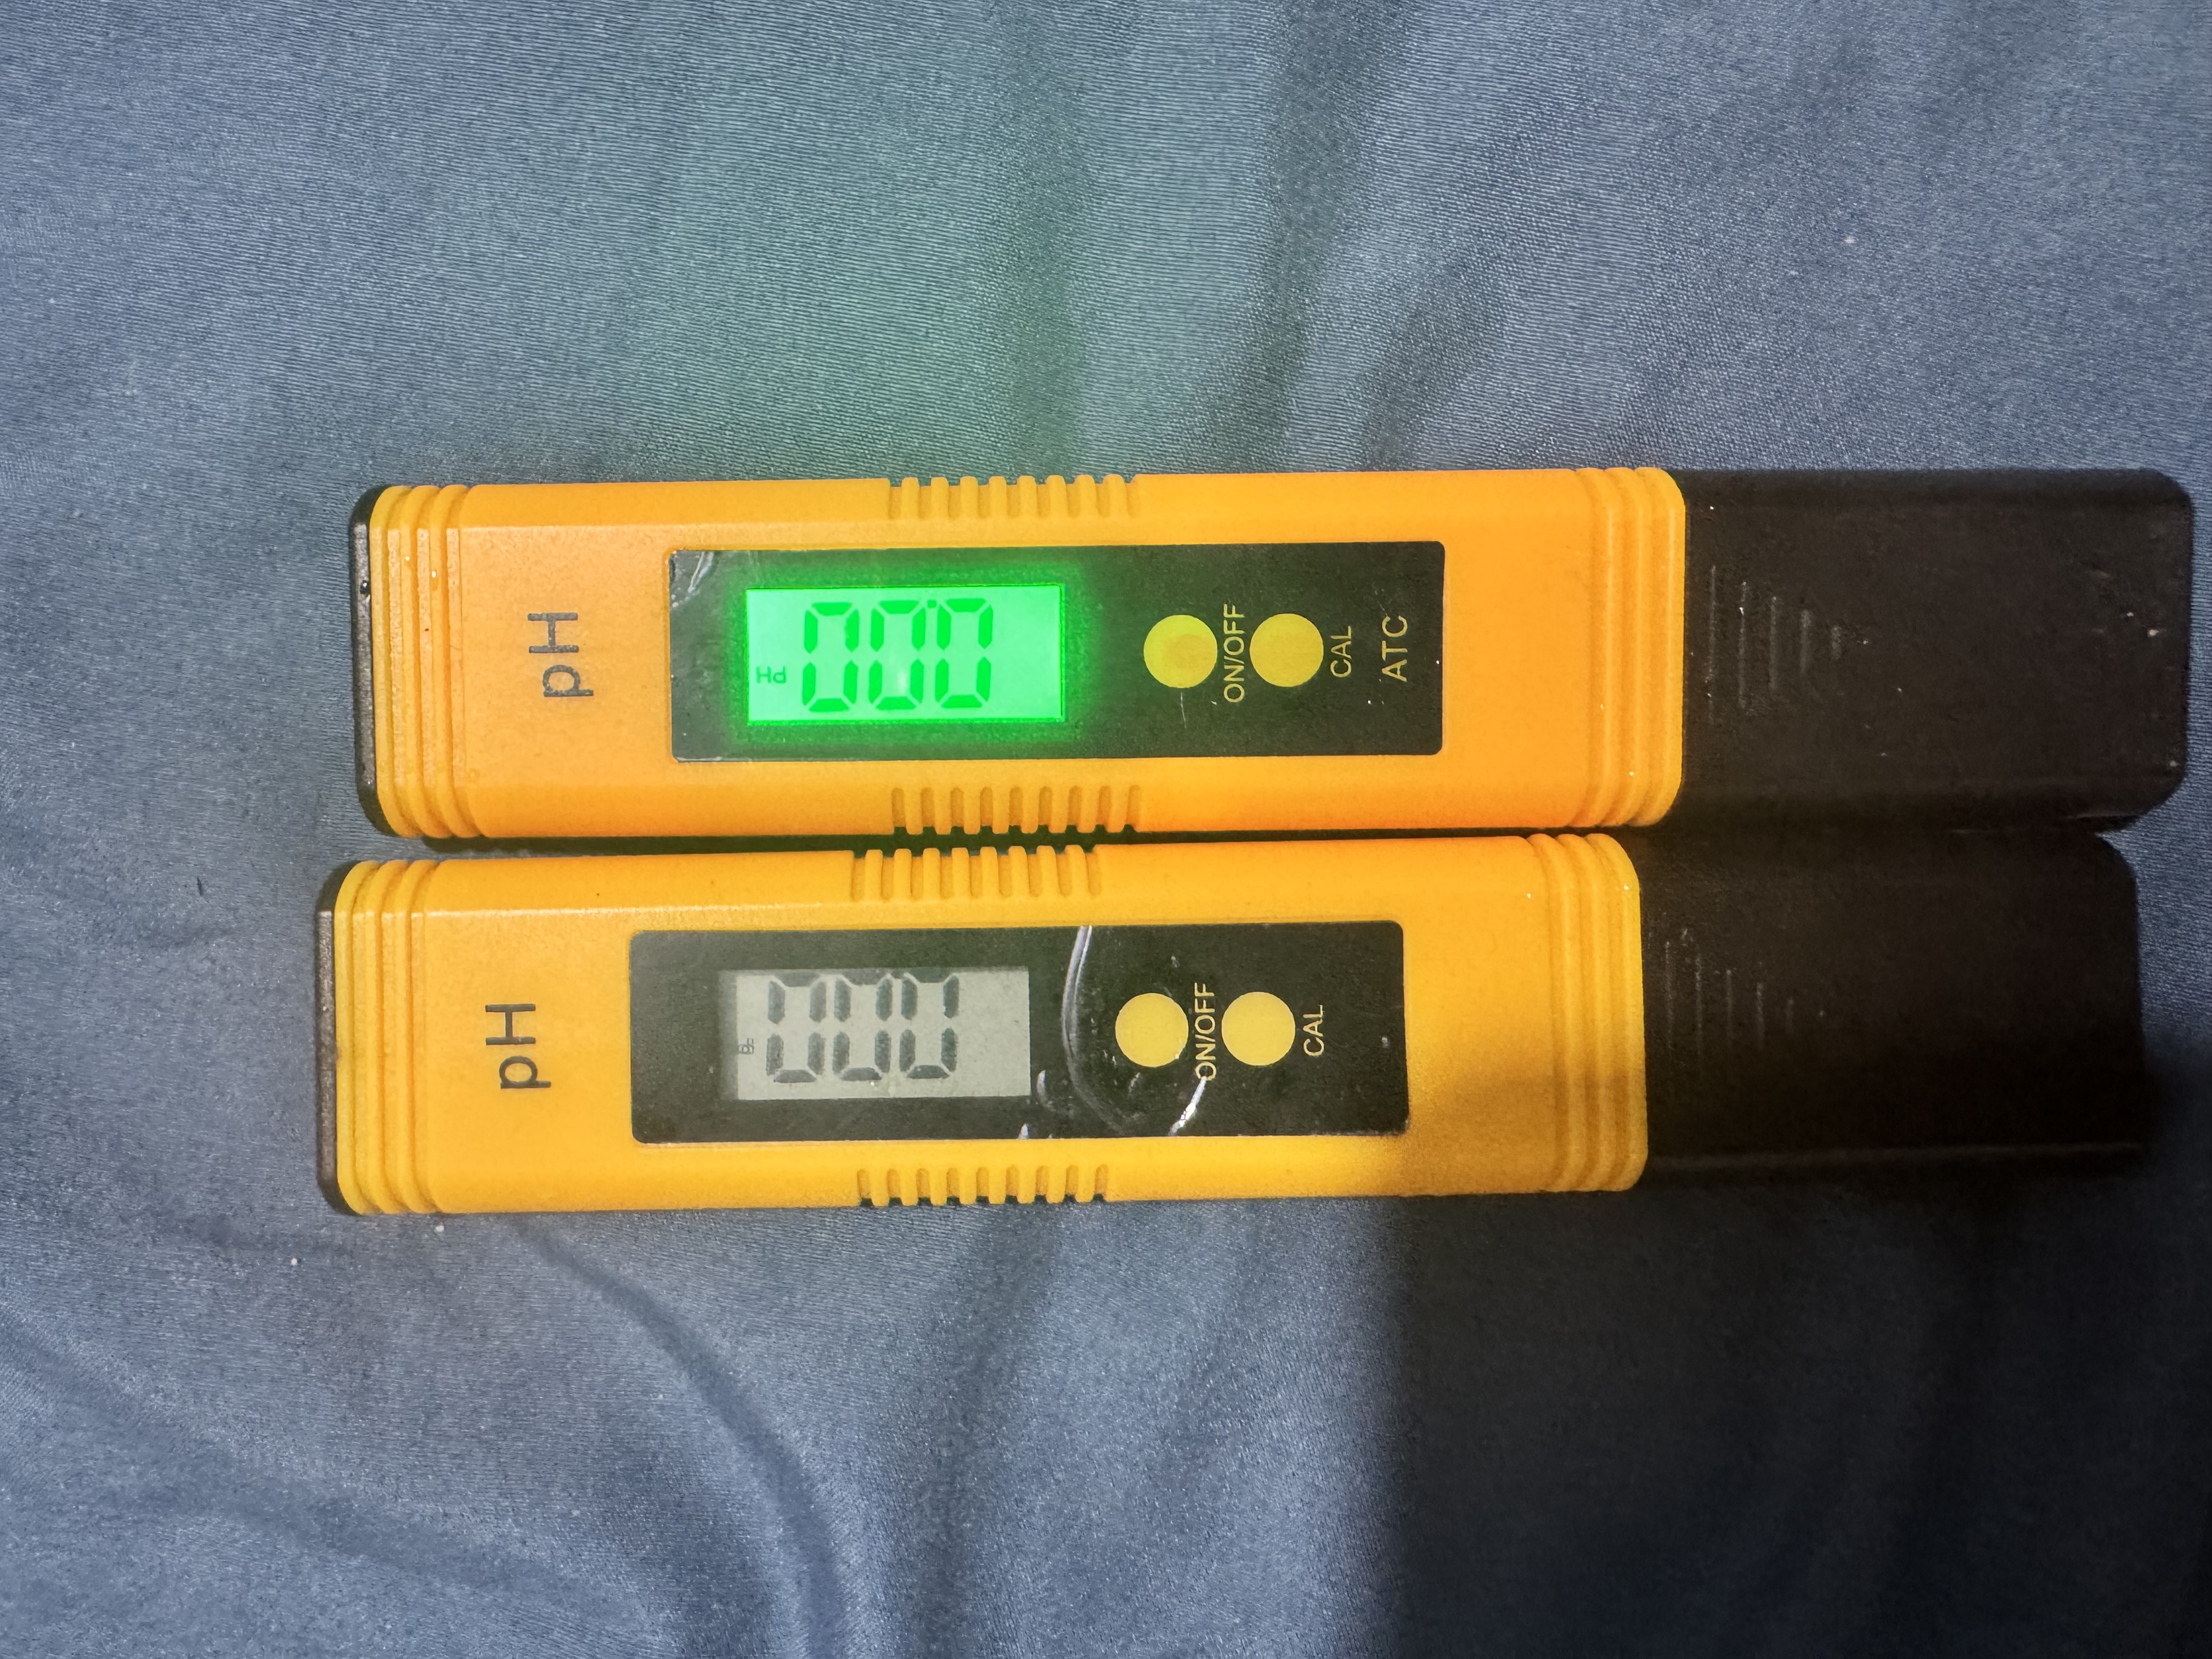
Choosing a pH Pen with Backlit Display
When selecting a pH test pen, consider models with backlit LCD displays for significantly improved readability. A backlit screen makes it much easier to read pH values in various lighting conditions, especially in dim environments like indoor aquariums, greenhouses, or when working outdoors during early morning or evening hours.
Benefits of Backlit pH Meters
Backlit displays offer several practical advantages for regular pH testing:
- Enhanced visibility in low-light conditions without needing additional lighting
- Reduced eye strain when taking multiple readings throughout the day
- Faster readings since you don’t need to adjust your position or add external light sources
- Professional presentation with clear, crisp digital numbers that are easy to photograph for record-keeping
For aquarium enthusiasts, hydroponic growers, and water quality professionals who frequently test pH in dimly lit areas, investing in a pH pen with a backlit display is highly recommended. The improved readability ensures you can confidently read accurate measurements without squinting or second-guessing the values, which is especially important when precise pH control is critical for sensitive applications like shrimp tanks or plant cultivation.
Conclusion
Regular calibration of your pH test pen using proper buffer solutions ensures accurate and reliable pH measurements. By following this two-point calibration procedure with pH 4.01 and pH 6.86 (or pH 7.0) buffer solutions, maintaining proper electrode care, and recalibrating when necessary, you’ll achieve consistent results for all your water quality testing needs. Remember to keep your electrode hydrated, use fresh buffer solutions, and store your pH meter properly to extend its lifespan and maintain accuracy.
Related Topics: pH meter troubleshooting, water quality testing, hydroponics pH management, aquarium pH testing, buffer solution preparation, electrode storage solutions
Last Updated: December 24, 2025